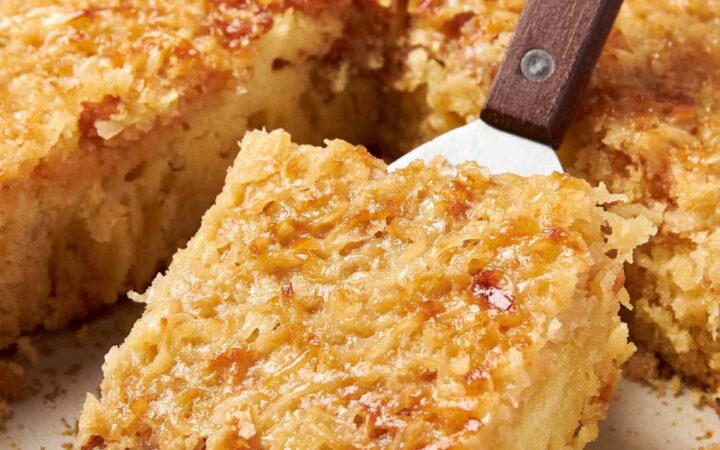
I remember the first time I tried tiramisu at a tiny café in Rome. I was hooked on that creamy, coffee-kissed goodness. Back home on my balcony, I knew I had to recreate it, but I was intimidated by the raw eggs and complicated steps. So I developed this beginner-friendly version that skips the fuss but keeps all the flavor.
Advertisements1
This recipe uses no raw eggs, so it's safe and simple. You just whisk, dip, and layer. It's the perfect make-ahead dessert for a dinner party or a quiet weekend treat. Trust me, if I can make this on my tiny balcony with a hand mixer, you can too.
Let's dive in and make your first tiramisu a success!
Why You'll Love This Recipe
About the Ingredients
1 1/2 cups (360ml) strong brewed coffee, cooled
Use espresso or strong dark roast. Instant espresso works too – just dissolve in hot water.
3 tablespoons coffee liqueur (optional)
Adds classic flavor. Substitute with 1 teaspoon vanilla extract mixed into the coffee if you prefer no alcohol.
4 large egg yolks
Room temperature. Use pasteurized eggs if you prefer extra safety.
1/2 cup (100g) granulated sugar
Regular white sugar. You can reduce to 1/3 cup if you prefer less sweet.
8 ounces (225g) mascarpone cheese
Full-fat mascarpone is best. Substitute with cream cheese softened and whipped for a tangy twist.
1 cup (240ml) heavy cream
Cold, for whipping. Use heavy whipping cream with at least 36% fat.
1 teaspoon vanilla extract
Pure vanilla extract preferred. Use 1/2 teaspoon almond extract for a different flavor.
24 ladyfinger cookies (about 7 oz / 200g)
Savoiardi ladyfingers are best. If you can't find them, use sponge cake cut into strips.
2 tablespoons unsweetened cocoa powder, for dusting
Dutch-processed cocoa gives a deeper color. Regular unsweetened works too.
Tips & Tricks
- Make sure your coffee is completely cool before dipping the ladyfingers, or they'll turn soggy.
- Dip each ladyfinger quickly – about 1 second per side. They soften as they sit.
- Chill the tiramisu for at least 4 hours, preferably overnight, to let the flavors meld.
Pro Tips
Step-by-Step Instructions
1. Brew and Cool Coffee
Brew 1 1/2 cups of strong coffee and let it cool completely. Stir in the coffee liqueur if using. Set aside.
2. Whisk Egg Yolks and Sugar
In a heatproof bowl, whisk the egg yolks and sugar together. Place over a pot of simmering water (double boiler) and whisk constantly for 5-7 minutes, until the mixture thickens and reaches 160°F (71°C). You'll see it become pale and creamy.
3. Add Mascarpone
Remove from heat and let cool slightly. Add the mascarpone cheese and vanilla, and whisk until smooth. Set aside.
4. Whip Heavy Cream
In a separate bowl, beat the cold heavy cream with a hand mixer on medium-high speed until stiff peaks form. Be careful not to over-whip.
5. Fold Cream into Mixture
Gently fold the whipped cream into the mascarpone mixture using a spatula, until no white streaks remain. Be gentle to keep it airy.
6. Dip Ladyfingers
Quickly dip each ladyfinger into the coffee mixture – about 1 second per side. Do not soak them. Place them in a single layer in an 8×8-inch (20×20 cm) dish, breaking to fit if needed.
7. Layer Half the Cream
Spread half of the mascarpone cream over the ladyfingers, smoothing the top. Repeat with another layer of dipped ladyfingers and the remaining cream.
8. Chill and Dust
Cover and refrigerate for at least 4 hours, or overnight. Before serving, dust generously with cocoa powder using a fine sieve.
Delicious Variations
Chocolate Tiramisu
Add 2 tablespoons of melted dark chocolate to the mascarpone mixture.
Berry Tiramisu
Replace coffee with a berry syrup and add fresh berries between layers.
Vegan Tiramisu
Use silken tofu and coconut cream, and vegan ladyfingers.
How to Store Easy Tiramisu For Beginners
Refrigerator
Store covered in the fridge for up to 3 days. The flavors improve overnight.
Freezer
Freeze the assembled tiramisu (without cocoa dusting) for up to 1 month. Thaw overnight in the fridge before serving.
Reheating
Tiramisu is served cold, so no reheating needed. Just let it sit at room temperature for 5-10 minutes before serving.
Frequently Asked Questions
Q: Can I make tiramisu without alcohol?
Yes, simply omit the coffee liqueur or replace it with vanilla extract. The coffee flavor remains strong.
Q: Why is my tiramisu runny?
A runny tiramisu usually means the cream wasn't whipped enough or the ladyfingers were over-soaked. Make sure your cream reaches stiff peaks and dip quickly.
Q: Can I use regular cream cheese instead of mascarpone?
Yes, you can substitute softened cream cheese, but whip it well to avoid lumps. The flavor will be slightly tangier.
Q: How long does tiramisu last in the fridge?
Tiramisu can be stored in the fridge for up to 3 days. Keep it covered to prevent it from drying out.
Q: Do I need to use raw eggs?
This recipe uses a cooked custard method, so there are no raw eggs. The yolks are heated with sugar to 160°F, making it safe.
I hope you enjoy making this easy tiramisu! If you try it, let me know in the comments below – I'd love to hear how it turns out. Happy growing!

Easy Tiramisu For Beginners
Easy Tiramisu For Beginners: creamy, coffee-soaked layers with a no-bake, foolproof method that tastes like Italy.
🧂 Ingredients
- 1 1/2 cups (360ml) strong brewed coffee, cooled
- 3 tablespoons coffee liqueur (optional)
- 4 large egg yolks
- 1/2 cup (100g) granulated sugar
- 8 ounces (225g) mascarpone cheese
- 1 cup (240ml) heavy cream
- 1 teaspoon vanilla extract
- 24 ladyfinger cookies (about 7 oz / 200g)
- 2 tablespoons unsweetened cocoa powder, for dusting
📋 Instructions
- 1Brew and Cool Coffee — Brew 1 1/2 cups of strong coffee and let it cool completely. Stir in the coffee liqueur if using. Set aside.
- 2Whisk Egg Yolks and Sugar — In a heatproof bowl, whisk the egg yolks and sugar together. Place over a pot of simmering water (double boiler) and whisk constantly for 5-7 minutes, until the mixture thickens and reaches 160°F (71°C). You'll see it become pale and creamy.
- 3Add Mascarpone — Remove from heat and let cool slightly. Add the mascarpone cheese and vanilla, and whisk until smooth. Set aside.
- 4Whip Heavy Cream — In a separate bowl, beat the cold heavy cream with a hand mixer on medium-high speed until stiff peaks form. Be careful not to over-whip.
- 5Fold Cream into Mixture — Gently fold the whipped cream into the mascarpone mixture using a spatula, until no white streaks remain. Be gentle to keep it airy.
- 6Dip Ladyfingers — Quickly dip each ladyfinger into the coffee mixture – about 1 second per side. Do not soak them. Place them in a single layer in an 8×8-inch (20×20 cm) dish, breaking to fit if needed.
- 7Layer Half the Cream — Spread half of the mascarpone cream over the ladyfingers, smoothing the top. Repeat with another layer of dipped ladyfingers and the remaining cream.
- 8Chill and Dust — Cover and refrigerate for at least 4 hours, or overnight. Before serving, dust generously with cocoa powder using a fine sieve.

Maya writes about urban gardening and sustainable living, focusing on small-space solutions and budget-friendly projects. She shares practical tips for growing food in apartments and balconies.