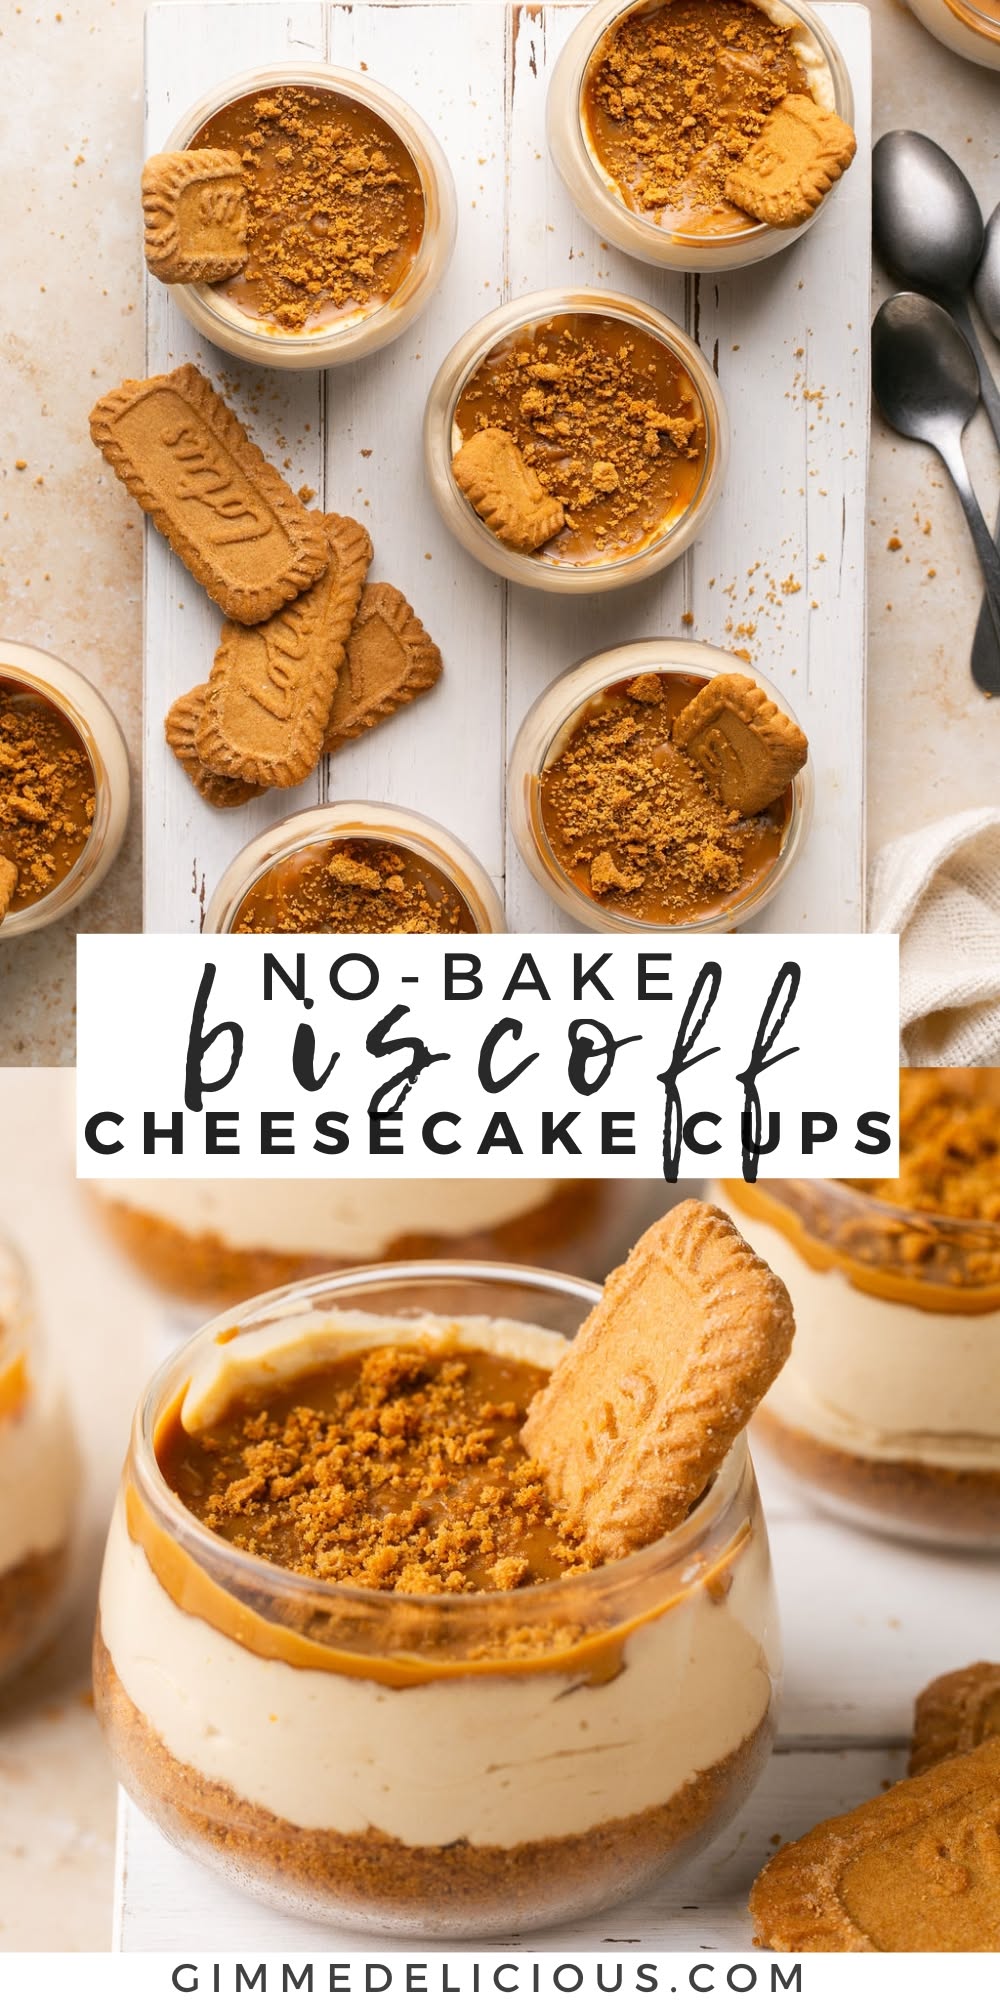
I still remember the first time I dragged a fork through a Biscoff cheesecake at a friend's backyard cookout in late August. The filling was cold and dense, the crust tasted like caramelized graham crackers, and the whole thing disappeared before the burgers even hit the grill. I went home that night and built my own version, and I have been tweaking it ever since.
Advertisements1
Here is the thing nobody tells you: Biscoff cheesecake is not just a cheesecake with cookies crushed into it. The spread is what makes it sing. It carries that deep caramelized, almost burnt-sugar flavor that cuts straight through the cream cheese, and when you fold it in by hand instead of beating it to death, you get a filling that sets like velvet.
This recipe is built for real kitchens. No water bath, no oven spring, no cracked top to apologize for. You press a crust, whip a filling, and let the fridge do the heavy lifting. If you can operate a stand mixer and a spatula, you can nail this on the first try.
Why You'll Love This Recipe
About the Ingredients
2 cups (200g) Biscoff cookie crumbs (about 30 cookies)
Pulse whole Lotus Biscoff cookies in a food processor until they look like wet sand. If you cannot find them, gingersnaps or speculoos cookies work, but add 1 tablespoon of brown sugar to compensate for the lower sweetness.
6 tablespoons (85g) unsalted butter, melted
Melt it and let it cool for 5 minutes so it does not seize the crumbs. Salted butter works in a pinch, just skip the pinch of salt in the crust.
1/4 teaspoon fine sea salt
This keeps the crust from tasting flat and sweet. Kosher salt is fine if you crush the flakes between your fingers first.
24 ounces (680g) full-fat cream cheese, room temperature
Full-fat is non-negotiable here, because low-fat cream cheese sets loose and grainy. Leave the bricks on the counter for 2 hours, or the filling will be lumpy no matter how long you beat it.
1 cup (240g) creamy Biscoff spread, divided
You need the smooth spread, not the crunchy kind, for a clean swirl. Warm it for 15 seconds in the microwave if it is stiff, and reserve 3 tablespoons for the top.
3/4 cup (150g) granulated sugar
Superfine sugar dissolves faster and gives a smoother filling. If you only have coarse granulated, pulse it in the food processor for 20 seconds first.
1 1/4 cups (300ml) heavy whipping cream, cold
Keep it in the fridge until the second you whip it. Half-and-half will not whip, so do not substitute it.
1 teaspoon vanilla extract
Real extract beats imitation every time. Bourbon vanilla adds a faint warmth that plays nicely with the spice in the cookies.
1/4 cup (60g) sour cream, room temperature
This adds tang and keeps the filling from tasting cloying. Full-fat Greek yogurt is a solid swap if you are out of sour cream.
Tips & Tricks
Room temperature is everything
Cold cream cheese will stay lumpy no matter how hard you beat it, so let the bricks sit out a full 2 hours before you start.
Do not over-whip the cream
Stop at soft-medium peaks, because stiff peaks turn grainy and make the filling dense instead of silky.
Chill longer than you think
Six hours is the minimum, but overnight gives you a filling that slices with a clean, sharp edge.
Wipe your knife between cuts
Run a hot knife under water, dry it, and slice. Wipe and re-warm between every single cut for bakery-clean slices.
Pro Tips
Step-by-Step Instructions
1. Build the crust
Pulse the cookies to fine crumbs, stir in the melted butter and salt, then press the mixture firmly into the bottom and 1 inch up the sides of a 9-inch springform pan. Use the flat bottom of a measuring cup to compact it hard, then chill the pan for 20 minutes while you make the filling.
2. Soften the cream cheese
Beat the room-temperature cream cheese and sugar on medium speed for 2 minutes until completely smooth, scraping the bowl twice. If you see even small lumps, keep going, because this is the only stage where you can fix them.
3. Add the flavorings
Beat in 3/4 cup of the Biscoff spread, the sour cream, and the vanilla on low speed until just combined, about 30 seconds. Do not crank the speed up, or you will whip air into the base and the cake will puff and then sink.
4. Whip the cream
In a separate cold bowl, whip the heavy cream on medium-high until it holds soft-medium peaks, about 3 to 4 minutes. It should droop off the whisk but still hold a shape, not stand stiff and dry.
5. Fold it together
Fold the whipped cream into the cream cheese mixture in three additions with a rubber spatula, using a gentle J-stroke and turning the bowl a quarter turn each time. Stop the moment the last white streak disappears.
6. Fill and swirl
Scrape the filling into the chilled crust and smooth the top with an offset spatula. Dollop the reserved 3 tablespoons of Biscoff spread over the surface and drag a skewer through it two or three times for a loose swirl.
7. Chill until set
Cover the pan with plastic wrap and refrigerate for at least 6 hours, ideally overnight. The center should feel firm and slightly springy when you press it lightly with a fingertip.
8. Release and slice
Run a thin knife around the inside of the pan, release the springform ring, and slide the cake onto a plate. Slice with a hot, dry knife, wiping it clean between cuts, and serve cold.
Delicious Variations
Chocolate Biscoff Cheesecake
Swap 2 tablespoons of the cookie crumbs for cocoa powder and drizzle melted dark chocolate over the swirl.
Salted Caramel Biscoff Cheesecake
Add 2 tablespoons of thick caramel sauce to the filling and finish with flaky sea salt before chilling.
Mini Biscoff Cheesecakes
Press the crust into a lined muffin tin and divide the filling among 12 cups, then chill for 3 hours instead of 6.
How to Store Biscoff Cheesecake Recipe
Refrigerator
Cover tightly or store under a cake dome for up to 4 days. Keep it cold until serving, and press plastic wrap directly onto cut surfaces to stop the edges from drying out.
Freezer
Freeze whole or in individual slices for up to 2 months. Wrap the cake in two layers of plastic wrap and one of foil, then thaw overnight in the refrigerator before serving.
Reheating
Do not reheat this cake. It is meant to be served cold straight from the fridge, and warming it will break the emulsion and turn the filling soft and weepy.
Frequently Asked Questions
Q: How long does Biscoff cheesecake need to set?
It needs a minimum of 6 hours in the refrigerator, though overnight is better. The filling firms up as the fat in the cream cheese and whipped cream chills and stabilizes, so cutting it early gives you a soft, slumping slice.
Q: Can I make Biscoff cheesecake without a springform pan?
Yes, you can build it in a 9-inch deep pie dish or a straight-sided cake pan lined with parchment overhang. A springform pan just makes release cleaner, so if you use a regular pan, line the bottom and lift the cake out by the parchment.
Q: Why is my Biscoff cheesecake filling lumpy?
Lumpy filling almost always means your cream cheese was still cold when you started beating it. Let the bricks sit at room temperature for a full 2 hours, and scrape the bowl down twice while mixing to catch any stubborn pockets.
Q: Is Biscoff cheesecake the same as cookie butter cheesecake?
Yes, they are the same thing, since Biscoff spread is widely sold under the name cookie butter in the United States. Any smooth speculoos-style spread will give you the identical caramelized, spiced flavor.
Q: How many calories are in a slice of Biscoff cheesecake?
A slice of this recipe comes in around 285 calories based on cutting the cake into 6 generous servings. If you slice it into 8 or 10 thinner pieces, each portion drops to roughly 170 to 215 calories.
Build this one the night before your next cookout and watch it vanish before the main course even hits the table. If you make it, come back and tell me how the swirl turned out, because that is the part people always ask about. Keep exploring.
Biscoff Cheesecake Recipe
This Biscoff cheesecake recipe delivers a silky spiced cookie filling on a buttery crust, a showstopper dessert that needs zero oven time.
🧂 Ingredients
- 2 cups (200g) Biscoff cookie crumbs (about 30 cookies)
- 6 tablespoons (85g) unsalted butter, melted
- 1/4 teaspoon fine sea salt
- 24 ounces (680g) full-fat cream cheese, room temperature
- 1 cup (240g) creamy Biscoff spread, divided
- 3/4 cup (150g) granulated sugar
- 1 1/4 cups (300ml) heavy whipping cream, cold
- 1 teaspoon vanilla extract
- 1/4 cup (60g) sour cream, room temperature
📋 Instructions
- 1Build the crust — Pulse the cookies to fine crumbs, stir in the melted butter and salt, then press the mixture firmly into the bottom and 1 inch up the sides of a 9-inch springform pan. Use the flat bottom of a measuring cup to compact it hard, then chill the pan for 20 minutes while you make the filling.
- 2Soften the cream cheese — Beat the room-temperature cream cheese and sugar on medium speed for 2 minutes until completely smooth, scraping the bowl twice. If you see even small lumps, keep going, because this is the only stage where you can fix them.
- 3Add the flavorings — Beat in 3/4 cup of the Biscoff spread, the sour cream, and the vanilla on low speed until just combined, about 30 seconds. Do not crank the speed up, or you will whip air into the base and the cake will puff and then sink.
- 4Whip the cream — In a separate cold bowl, whip the heavy cream on medium-high until it holds soft-medium peaks, about 3 to 4 minutes. It should droop off the whisk but still hold a shape, not stand stiff and dry.
- 5Fold it together — Fold the whipped cream into the cream cheese mixture in three additions with a rubber spatula, using a gentle J-stroke and turning the bowl a quarter turn each time. Stop the moment the last white streak disappears.
- 6Fill and swirl — Scrape the filling into the chilled crust and smooth the top with an offset spatula. Dollop the reserved 3 tablespoons of Biscoff spread over the surface and drag a skewer through it two or three times for a loose swirl.
- 7Chill until set — Cover the pan with plastic wrap and refrigerate for at least 6 hours, ideally overnight. The center should feel firm and slightly springy when you press it lightly with a fingertip.
- 8Release and slice — Run a thin knife around the inside of the pan, release the springform ring, and slide the cake onto a plate. Slice with a hot, dry knife, wiping it clean between cuts, and serve cold.

Liam covers outdoor adventure and gear reviews, with a focus on ultralight backpacking and wilderness survival. He writes from personal trial and error, emphasizing safety and practical experience.