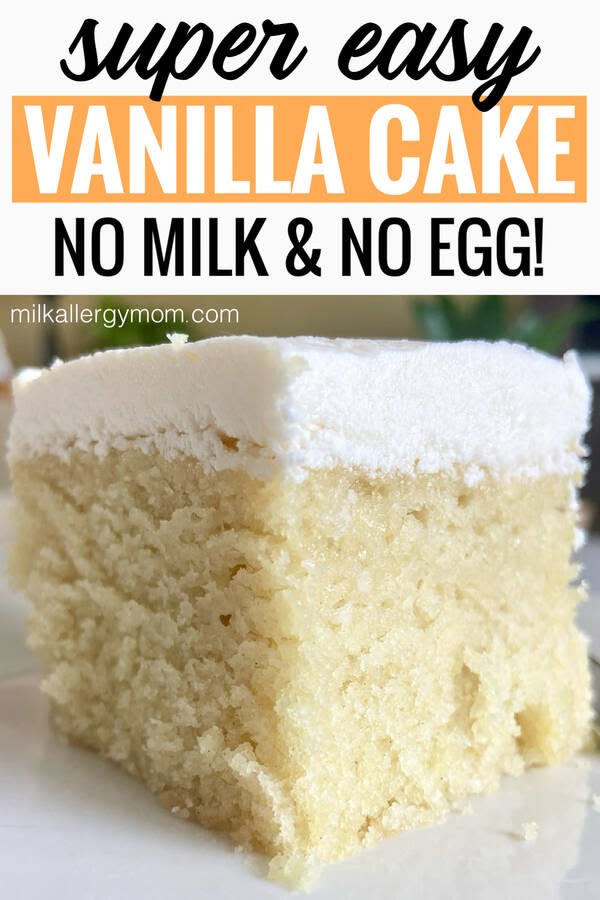
This Egg Free Dairy Free Nut Free Cake is my go-to for celebrations when I need to feed a crowd with food allergies. It’s a simple vanilla layer cake that’s incredibly moist and tender, thanks to a secret ingredient you probably have in your pantry.
Advertisements1
I remember baking this for my neighbor’s daughter’s birthday – she has multiple allergies. Watching her face light up as she blew out the candles was priceless. Since then, it’s been my most-requested recipe from friends with dietary restrictions.
You won’t miss the eggs or butter here. The cake is light, fluffy, and perfectly sweet. Plus, it’s easy to make with everyday ingredients – no weird substitutes needed.
Why You'll Love This Recipe
About the Ingredients
2 1/2 cups (315g) all-purpose flour
Use all-purpose flour for structure. If you need gluten-free, you can substitute a 1:1 gluten-free blend, but the texture may vary slightly.
1 1/2 cups (300g) granulated sugar
Standard white sugar works best. You can reduce to 1 1/4 cups for a less sweet cake, but don't go below that or the structure may suffer.
1 1/2 teaspoons baking soda
This reacts with the vinegar to help the cake rise. Make sure it's fresh for best results.
1 teaspoon salt
Fine sea salt or table salt both work. It balances the sweetness.
1 1/2 cups (360ml) water
Warm water helps dissolve the sugar and activates the leavening. You can also use coffee for a mocha twist, but water keeps it neutral.
1/2 cup (120ml) vegetable oil
Use a neutral oil like canola or sunflower. Coconut oil (melted) also works, but it will add a slight coconut flavor.
1 tablespoon white vinegar
This reacts with baking soda for lift. Apple cider vinegar works too, but white vinegar has a neutral taste.
2 teaspoons vanilla extract
Pure vanilla extract gives the best flavor. You can use imitation if that's what you have, but pure is worth it.
Tips & Tricks
Don’t overmix the batter
Mix just until the flour disappears. Overmixing develops gluten and makes the cake tough.
Use a kitchen scale for accuracy
Measuring flour by volume can lead to too much flour, making the cake dry. If you don’t have a scale, spoon flour into the cup and level with a knife.
Check for doneness early
Ovens vary. Start checking at 30 minutes by inserting a toothpick into the center – it should come out clean or with a few moist crumbs.
Pro Tips
Step-by-Step Instructions
1. Preheat oven to 350°F (175°C)
Preheat your oven to 350°F (175°C). Grease and flour a 9×13-inch baking pan or line it with parchment paper for easy removal.
2. Whisk dry ingredients
In a large bowl, whisk together the flour, sugar, baking soda, and salt. Make sure there are no lumps.
3. Add wet ingredients
Pour the water, oil, vinegar, and vanilla extract into the dry ingredients. Stir with a whisk or spatula until just combined. The batter will be thin – that’s normal.
4. Pour batter into pan
Pour the batter into your prepared pan. Smooth the top with a spatula if needed.
5. Bake for 30-35 minutes
Bake for 30-35 minutes, or until a toothpick inserted into the center comes out clean. The top should be golden brown and spring back when lightly touched.
6. Cool completely
Let the cake cool in the pan on a wire rack for 10 minutes, then turn it out onto the rack to cool completely before frosting or serving.
Delicious Variations
Lemon Poppy Seed
Add 2 tablespoons of poppy seeds and the zest of 1 lemon to the dry ingredients. Replace 1/4 cup of water with lemon juice.
Chocolate
Replace 1/2 cup of flour with 1/2 cup unsweetened cocoa powder. Increase water to 1 3/4 cups.
Spiced
Add 1 teaspoon cinnamon, 1/2 teaspoon nutmeg, and 1/4 teaspoon cloves to the dry ingredients for a warm autumn flavor.
How to Store Egg Free Dairy Free Nut Free Cake
Refrigerator
Store frosted cake in an airtight container in the fridge for up to 4 days. Let sit at room temperature for 30 minutes before serving for best flavor.
Freezer
Wrap unfrosted cake tightly in plastic wrap and foil. Freeze for up to 3 months. Thaw overnight in the fridge before frosting.
Reheating
For a warm treat, microwave a slice for 10-15 seconds until just warm. Do not overheat or it will dry out.
Frequently Asked Questions
Q: What can I use instead of eggs in a cake?
For this cake, you don’t need an egg substitute – the combination of baking soda and vinegar creates the lift. For other recipes, common egg substitutes include applesauce, mashed banana, or flax eggs.
Q: Can I make this cake gluten-free?
Yes, you can use a 1:1 gluten-free all-purpose flour blend. Make sure it contains xanthan gum for structure. The texture may be slightly more delicate, but it will still be delicious.
Q: How do I make a vegan frosting for this cake?
A simple vegan buttercream uses vegan butter (like Earth Balance) and powdered sugar, with a splash of non-dairy milk. Or you can dust with powdered sugar for a simple finish.
Q: Why is my cake dense or sunken?
A dense or sunken cake often comes from overmixing the batter or using expired baking soda. Mix just until combined, and check that your baking soda is fresh.
Q: Can I use apple cider vinegar instead of white vinegar?
Yes, apple cider vinegar works well. It has a slightly fruity flavor but won’t affect the cake negatively. Just make sure it has at least 5% acidity.
I hope you love this allergy-friendly cake as much as my family does! If you try it, let me know in the comments below – I’d love to hear how it turned out. Happy growing!
Egg Free Dairy Free Nut Free Cake
Easy Egg Free Dairy Free Nut Free Cake is a moist, fluffy vanilla cake perfect for allergies and birthdays. Enjoy a slice today!
🧂 Ingredients
- 2 1/2 cups (315g) all-purpose flour
- 1 1/2 cups (300g) granulated sugar
- 1 1/2 teaspoons baking soda
- 1 teaspoon salt
- 1 1/2 cups (360ml) water
- 1/2 cup (120ml) vegetable oil
- 1 tablespoon white vinegar
- 2 teaspoons vanilla extract
📋 Instructions
- 1Preheat oven to 350°F (175°C) — Preheat your oven to 350°F (175°C). Grease and flour a 9×13-inch baking pan or line it with parchment paper for easy removal.
- 2Whisk dry ingredients — In a large bowl, whisk together the flour, sugar, baking soda, and salt. Make sure there are no lumps.
- 3Add wet ingredients — Pour the water, oil, vinegar, and vanilla extract into the dry ingredients. Stir with a whisk or spatula until just combined. The batter will be thin – that’s normal.
- 4Pour batter into pan — Pour the batter into your prepared pan. Smooth the top with a spatula if needed.
- 5Bake for 30-35 minutes — Bake for 30-35 minutes, or until a toothpick inserted into the center comes out clean. The top should be golden brown and spring back when lightly touched.
- 6Cool completely — Let the cake cool in the pan on a wire rack for 10 minutes, then turn it out onto the rack to cool completely before frosting or serving.

Maya writes about urban gardening and sustainable living, focusing on small-space solutions and budget-friendly projects. She shares practical tips for growing food in apartments and balconies.