I never thought I'd be able to enjoy a classic chocolate cheesecake again after giving up dairy. But one rainy afternoon on my balcony, I decided to experiment with silken tofu and dark chocolate, and the result was so creamy and decadent that my non-vegan friends couldn't tell the difference.
Advertisements1
This recipe is a game-changer. It's surprisingly simple to make, requires no baking, and uses wholesome ingredients that you can easily find at your local grocery store. Whether you're lactose-intolerant, vegan, or just looking for a healthier dessert, this cheesecake will hit the spot.
The secret lies in the combination of silken tofu and coconut cream, which creates a luxuriously smooth texture that mimics traditional cream cheese perfectly. The dark chocolate adds a deep, rich flavor that pairs beautifully with the subtle sweetness of maple syrup.
Why You'll Love This Recipe
About the Ingredients
1 ½ cups (180g) raw cashews
Soaked in hot water for 2 hours, then drained. For a nut-free version, use 1 ½ cups raw sunflower seeds.
½ cup (120ml) coconut cream
The thick part from a chilled can of full-fat coconut milk. You can also use store-bought coconut cream.
½ cup (120ml) maple syrup
For sweetness. Substitute with agave nectar or honey (if not strictly vegan).
¼ cup (60ml) coconut oil, melted
Helps the cheesecake set. Use refined coconut oil for a neutral taste.
1 tsp vanilla extract
Pure vanilla extract adds depth. You can use vanilla bean paste for a more intense flavor.
8 oz (225g) dairy-free dark chocolate, melted
Use good quality chocolate (70% cocoa). For a milder flavor, use semi-sweet.
1 ½ cups (180g) dairy-free graham cracker crumbs
Check labels for dairy-free. You can also use crushed Oreos (vegan ones) or digestive biscuits.
¼ cup (60ml) melted coconut oil (for the crust)
Use refined or unrefined, both work. If using unrefined, it may add a slight coconut taste.
Pinch of sea salt
Enhances the chocolate flavor. Use fine salt for even distribution.
Tips & Tricks
- Soak the cashews for at least 2 hours in hot water to ensure a silky smooth texture.
- Use full-fat coconut cream for the best creamy consistency; light versions will make the filling runny.
- Melt the chocolate slowly in a double boiler or in short bursts in the microwave to avoid burning.
- For a clean slice, dip your knife in hot water and wipe it dry before each cut.
Pro Tips
Step-by-Step Instructions
1. Prepare the Crust
In a medium bowl, mix the graham cracker crumbs, melted coconut oil, and a pinch of salt until well combined. Press the mixture firmly into the bottom of a 9-inch (23-cm) springform pan. Place in the freezer while you make the filling.
2. Melt the Chocolate
Break the dark chocolate into pieces and melt in a heatproof bowl over simmering water (double boiler) or in the microwave in 30-second intervals, stirring frequently. Set aside to cool slightly.
3. Soak and Blend Cashews
Drain the soaked cashews and add them to a high-speed blender along with the coconut cream, maple syrup, melted coconut oil, and vanilla extract. Blend on high until completely smooth and creamy, about 2 minutes. Scrape down the sides as needed.
4. Add the Melted Chocolate
Add the slightly cooled melted chocolate to the blender and blend again until fully incorporated. The mixture should be a uniform dark brown color and velvety smooth.
5. Pour and Spread
Retrieve the springform pan from the freezer. Pour the chocolate filling over the crust and spread evenly with a spatula. Tap the pan gently on the counter to release any air bubbles.
6. Chill Until Set
Cover the pan with plastic wrap or foil and refrigerate for at least 4 hours, or until firm. For best results, chill overnight.
7. Unmold and Serve
When ready to serve, run a thin knife around the edge of the pan to loosen the cheesecake, then release the springform. Slice with a sharp knife and serve chilled. Optionally, garnish with fresh berries or a dusting of cocoa powder.
Delicious Variations
Peanut Butter Chocolate
Swirl in ½ cup of peanut butter before chilling.
Mint Chocolate
Add 1 teaspoon of peppermint extract to the filling.
Raspberry Swirl
Dollop raspberry jam on top and swirl with a knife.
How to Store Chocolate Cheesecake Without Dairy
Refrigerator
Store in an airtight container in the refrigerator for up to 5 days.
Freezer
Wrap the cheesecake (whole or individual slices) tightly in plastic wrap and freeze for up to 2 months.
Reheating
This cheesecake is best served cold. If frozen, thaw in the refrigerator overnight before serving.
Frequently Asked Questions
Q: Can I use silken tofu instead of cashews?
Yes, you can substitute silken tofu for cashews. Use 1 ½ cups of silken tofu (about 12 oz) and blend until smooth. The texture will be slightly softer, but it will still set.
Q: How long does this cheesecake need to set?
It needs at least 4 hours in the refrigerator, but for the best texture, chill it overnight. This ensures it's fully firm and slices cleanly.
Q: Can I make this cheesecake without coconut oil?
Yes, you can use vegan butter or a neutral oil like sunflower oil. The coconut oil helps the filling set, so if you omit it, the cheesecake may be softer.
Q: Is this recipe gluten-free?
It can be! Use gluten-free graham crackers or a gluten-free cookie crust. The filling is naturally gluten-free.
Q: What can I use for the crust instead of graham crackers?
You can use crushed Oreos (vegan ones), digestive biscuits, or even ground almonds mixed with a little coconut oil. Adjust the quantity to achieve a crumbly texture.
I hope you love this dairy-free chocolate cheesecake as much as I do! If you make it, let me know in the comments below. Happy growing!
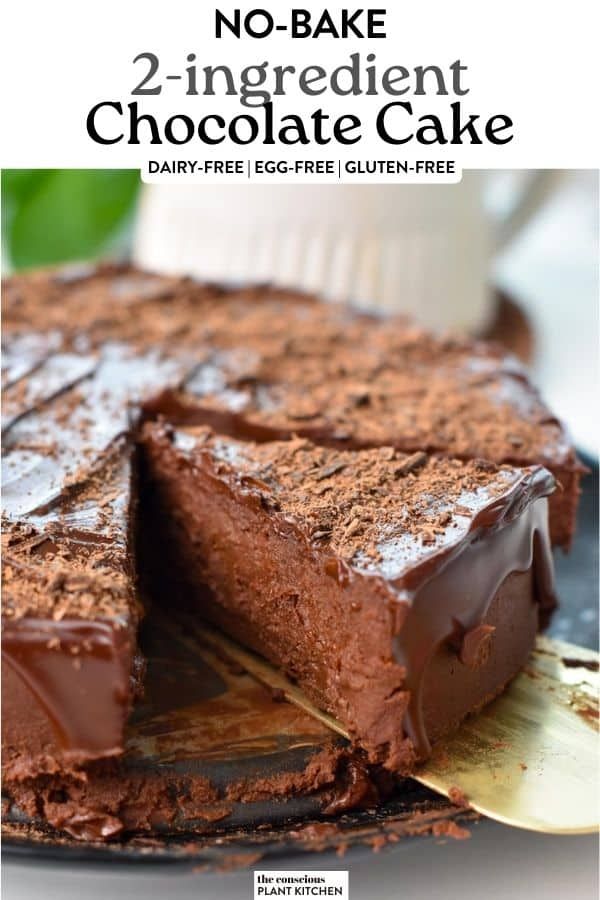
Chocolate Cheesecake Without Dairy
Indulge in this rich, creamy chocolate cheesecake without dairy – a perfect dessert that everyone can enjoy, made with simple plant-based ingredients.
🧂 Ingredients
- 1 ½ cups (180g) raw cashews
- ½ cup (120ml) coconut cream
- ½ cup (120ml) maple syrup
- ¼ cup (60ml) coconut oil, melted
- 1 tsp vanilla extract
- 8 oz (225g) dairy-free dark chocolate, melted
- 1 ½ cups (180g) dairy-free graham cracker crumbs
- ¼ cup (60ml) melted coconut oil (for the crust)
- Pinch of sea salt
📋 Instructions
- 1Prepare the Crust — In a medium bowl, mix the graham cracker crumbs, melted coconut oil, and a pinch of salt until well combined. Press the mixture firmly into the bottom of a 9-inch (23-cm) springform pan. Place in the freezer while you make the filling.
- 2Melt the Chocolate — Break the dark chocolate into pieces and melt in a heatproof bowl over simmering water (double boiler) or in the microwave in 30-second intervals, stirring frequently. Set aside to cool slightly.
- 3Soak and Blend Cashews — Drain the soaked cashews and add them to a high-speed blender along with the coconut cream, maple syrup, melted coconut oil, and vanilla extract. Blend on high until completely smooth and creamy, about 2 minutes. Scrape down the sides as needed.
- 4Add the Melted Chocolate — Add the slightly cooled melted chocolate to the blender and blend again until fully incorporated. The mixture should be a uniform dark brown color and velvety smooth.
- 5Pour and Spread — Retrieve the springform pan from the freezer. Pour the chocolate filling over the crust and spread evenly with a spatula. Tap the pan gently on the counter to release any air bubbles.
- 6Chill Until Set — Cover the pan with plastic wrap or foil and refrigerate for at least 4 hours, or until firm. For best results, chill overnight.
- 7Unmold and Serve — When ready to serve, run a thin knife around the edge of the pan to loosen the cheesecake, then release the springform. Slice with a sharp knife and serve chilled. Optionally, garnish with fresh berries or a dusting of cocoa powder.

Maya writes about urban gardening and sustainable living, focusing on small-space solutions and budget-friendly projects. She shares practical tips for growing food in apartments and balconies.