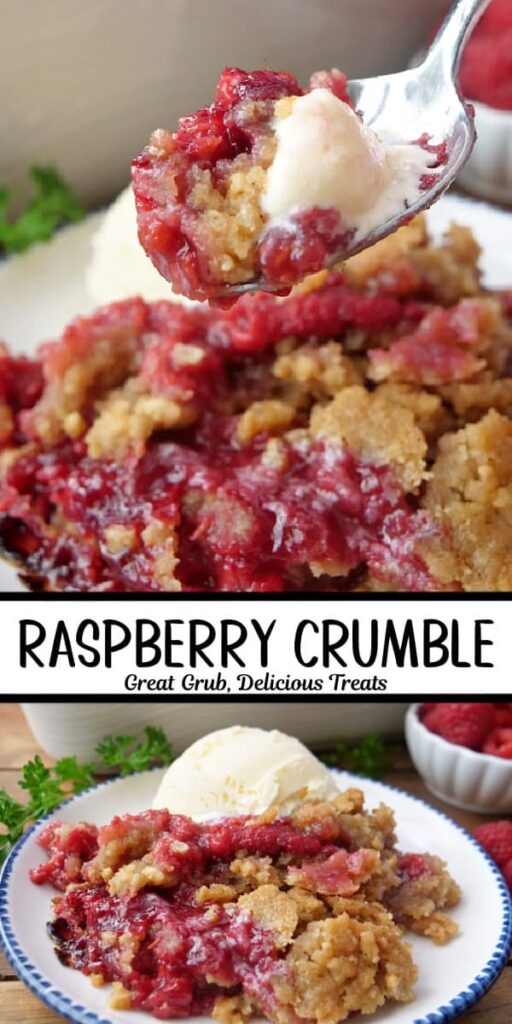
The first time I made this, I was standing in a cabin kitchen in the Cascades with a flat of raspberries going soft faster than I could eat them. The oven was cranky, the window was fogged, and I dumped those berries into a cast-iron skillet with sugar and lemon and prayed. Twenty minutes later the whole place smelled like a bakery and my hands were stained red. That's the deal with a crisp: it forgives you.
Advertisements1
A pie demands cold butter, careful crimping, and patience. A crisp asks for a bowl, a fork, and about ten minutes of your attention. The oats go craggy and golden, the berries collapse into jammy syrup, and the edges bubble up dark and sticky against the pan. You eat it warm with vanilla ice cream melting into the cracks.
I've made this with frozen berries in February and fresh-picked ones in July. Fresh is better, no argument, but the method holds either way. What follows is the version I keep coming back to, tested enough times that I know exactly where it can go wrong and how to steer it straight.
Why You'll Love This Recipe
About the Ingredients
6 cups (about 720g) fresh raspberries
Raspberries are fragile, so pick berries that are dry and deep red, not leaking juice in the clamshell. If they're frozen, use them straight from the freezer without thawing and add 1 extra tablespoon of cornstarch.
1/2 cup (100g) granulated sugar
White sugar lets the berry flavor lead; if you only have raw turbinado, it works but adds a molasses note and takes longer to dissolve. Taste your berries first, if they're already sweet, drop to 1/3 cup.
2 tablespoons cornstarch
Cornstarch is what turns weeping berries into glossy syrup. Arrowroot or tapioca starch substitutes one-for-one, but tapioca needs a few extra minutes in the oven to fully thicken.
1 tablespoon fresh lemon juice plus 1 teaspoon zest
The acid keeps the filling from tasting flat, and the zest carries the aroma. Bottled lemon juice is a last resort, use half the amount since it's more bitter.
1 cup (125g) all-purpose flour
Standard AP flour gives the topping structure. For a gluten-free version, swap in a 1-to-1 baking blend plus 2 tablespoons of almond flour for tenderness.
1 cup (90g) old-fashioned rolled oats
Rolled oats, not instant, give you the chewy, craggy texture that defines a crisp. Quick oats turn to paste, and steel-cut oats stay too hard.
3/4 cup (165g) packed light brown sugar
Brown sugar brings moisture and caramel depth. Dark brown sugar works but pushes the topping toward molasses territory, which can overpower delicate berries.
1/2 teaspoon ground cinnamon and 1/4 teaspoon fine salt
Cinnamon is optional but ties the fruit and oats together; nutmeg or a pinch of cardamom are good swaps. The salt is non-negotiable, it makes the sweetness read louder.
3/4 cup (170g) cold unsalted butter, cut into cubes
Cold butter is the whole game here, it creates those shaggy clumps. Salted butter works if you cut the added salt to a pinch.
1/2 cup (50g) sliced almonds or chopped pecans
Optional but worth it for crunch. Walnuts or pepitas are fine swaps, just chop them so no piece is bigger than a pea.
Tips & Tricks
Don't overwork the topping
Stop mixing when you see pea-sized butter bits and shaggy clumps. If you keep going, the butter melts into the flour and you get a sandy, dense crust instead of a crisp one.
Toss the berries gently
Fold the sugar and cornstarch in with your hands or a rubber spatula, not a spoon you're mashing with. Bruised berries release water early and make the filling soupy.
Bake on a sheet pan
Put the dish on a foil-lined rimmed baking sheet. Raspberry filling always bubbles over the edge, and scrubbing burnt sugar off an oven floor is a special kind of misery.
Let it rest before serving
Ten to fifteen minutes out of the oven lets the cornstarch finish setting. Serve it screaming hot and the filling runs across the plate like juice.
Pro Tips
Step-by-Step Instructions
1. Heat the oven
Preheat the oven to 375°F (190°C) and set a rack in the middle position. Line a rimmed baking sheet with foil and set your 9×13-inch baking dish on top of it.
2. Toss the berries
In a large bowl, combine the raspberries, granulated sugar, cornstarch, lemon juice, and lemon zest. Fold gently with a spatula until every berry is coated, then scrape the mixture into the baking dish and spread it into an even layer.
3. Mix the topping
In a separate bowl, whisk together the flour, rolled oats, brown sugar, cinnamon, and salt. Add the cold butter cubes and cut them in with a pastry blender or your fingertips until you have pea-sized butter bits and shaggy clumps.
4. Add the nuts
Stir the sliced almonds or pecans into the crumble with a few quick turns. Don't overmix, you want the texture uneven and craggy.
5. Blanket the fruit
Scatter the topping evenly over the berries and press it down very lightly with your palm. Leaving a few gaps is fine, steam needs somewhere to escape.
6. Bake until bubbling
Bake at 375°F (190°C) for 32 to 38 minutes, until the topping is deep golden brown and the filling bubbles thickly around the edges. The center should read about 200°F (93°C) on an instant-read thermometer.
7. Rest and serve
Pull the crisp from the oven and let it sit 15 minutes on a wire rack. The filling will set from runny to spoonable. Serve warm with vanilla ice cream or a pour of cold cream.
Delicious Variations
Mixed Berry Crisp
Swap half the raspberries for blackberries and blueberries. The blueberries hold shape and add a jammy pop, but add 1 extra tablespoon of cornstarch since they release more liquid.
Raspberry Rhubarb Crisp
Use 4 cups raspberries and 2 cups chopped rhubarb tossed with an extra 2 tablespoons sugar. Rhubarb brings a bracing tartness that cuts the topping's sweetness.
Almond-Coconut Crisp
Replace the sliced almonds with 1/2 cup unsweetened coconut flakes and add 1/4 teaspoon almond extract to the filling. Toast the coconut first if you want a deeper, nuttier edge.
How to Store Fresh Raspberry Crisp
Refrigerator
Cover tightly with foil or transfer to an airtight container and refrigerate up to 4 days. The topping softens over time, so re-crisp it in a 350°F (175°C) oven for 10 minutes.
Freezer
Baked crisp freezes well for up to 3 months in a freezer-safe container. You can also assemble it unbaked, wrap it tightly, and freeze, then bake straight from frozen at 375°F (190°C) for 50 to 60 minutes.
Reheating
Reheat individual portions in a 350°F (175°C) oven for 10 to 12 minutes, or microwave for 45 seconds if you don't mind a softer topping. Never reheat in the microwave on high for more than a minute, the berries turn to lava.
Frequently Asked Questions
Q: Can I use frozen raspberries for this crisp?
Yes, and you don't need to thaw them first. Toss the frozen berries with an extra tablespoon of cornstarch and add 5 minutes to the bake time, since the cold fruit drops the oven temperature. The filling will be a touch looser but every bit as good.
Q: Why is my raspberry crisp watery?
Almost always too little cornstarch or fruit that was overripe and leaking before it hit the oven. Use 2 tablespoons of cornstarch for 6 cups of berries, toss gently so you don't crush them, and let the baked crisp rest 15 minutes so the filling sets.
Q: What's the difference between a crisp and a crumble?
A crisp topping contains oats, which is what gives it that nubby, crunchy texture. A crumble is typically just flour, butter, and sugar, so it bakes up more like a shortbread streusel. Both are excellent, but they are not the same thing.
Q: Can I make raspberry crisp ahead of time?
You can assemble it up to 24 hours ahead, cover it, and refrigerate it unbaked, then add 5 to 8 minutes to the bake time. For longer storage, freeze it unbaked for up to 3 months and bake from frozen at 375°F (190°C) for 50 to 60 minutes.
Q: How do I know when the crisp is done?
The topping should be deep golden brown and the filling should bubble thickly at the edges, not just in the center. If you want a number, the middle of the filling hits about 200°F (93°C) when it's properly thickened.
Go grab a flat of raspberries while they're cheap and in season, and make this tonight. It's the kind of dessert that makes a Tuesday feel like something worth sitting down for. If you make it, tell me whether you went with almonds or pecans, I want to know. Keep exploring.
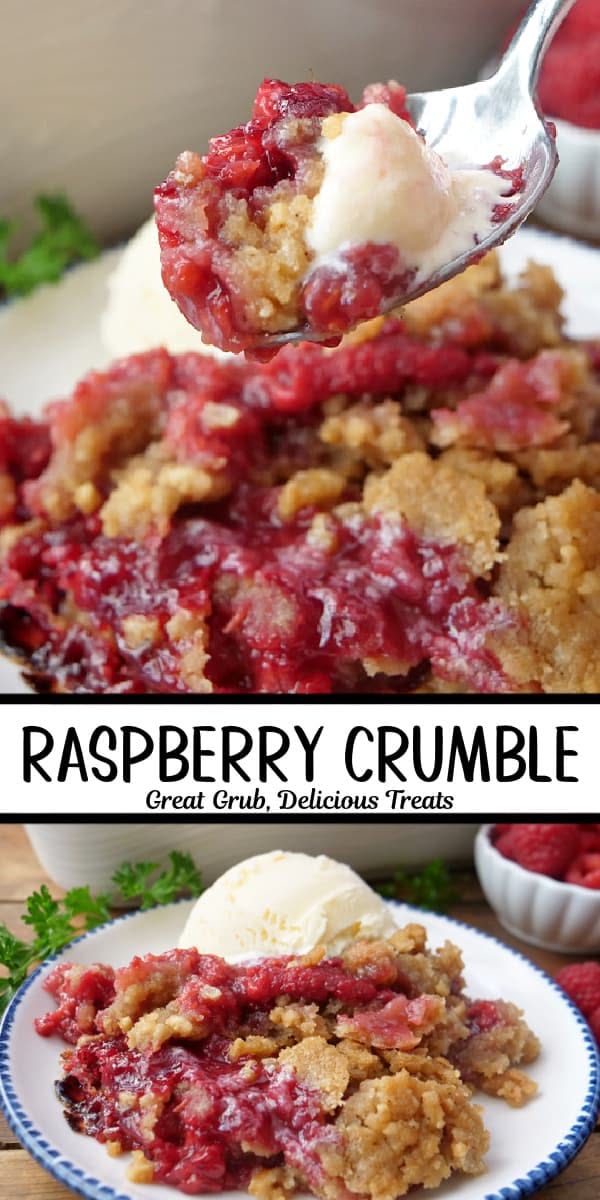
Fresh Raspberry Crisp
Fresh Raspberry Crisp bakes juicy berries under a buttery oat topping for a warm, bubbling dessert that beats pie any night of the week.
🧂 Ingredients
- 6 cups (about 720g) fresh raspberries
- 1/2 cup (100g) granulated sugar
- 2 tablespoons cornstarch
- 1 tablespoon fresh lemon juice plus 1 teaspoon zest
- 1 cup (125g) all-purpose flour
- 1 cup (90g) old-fashioned rolled oats
- 3/4 cup (165g) packed light brown sugar
- 1/2 teaspoon ground cinnamon and 1/4 teaspoon fine salt
- 3/4 cup (170g) cold unsalted butter, cut into cubes
- 1/2 cup (50g) sliced almonds or chopped pecans
📋 Instructions
- 1Heat the oven — Preheat the oven to 375°F (190°C) and set a rack in the middle position. Line a rimmed baking sheet with foil and set your 9×13-inch baking dish on top of it.
- 2Toss the berries — In a large bowl, combine the raspberries, granulated sugar, cornstarch, lemon juice, and lemon zest. Fold gently with a spatula until every berry is coated, then scrape the mixture into the baking dish and spread it into an even layer.
- 3Mix the topping — In a separate bowl, whisk together the flour, rolled oats, brown sugar, cinnamon, and salt. Add the cold butter cubes and cut them in with a pastry blender or your fingertips until you have pea-sized butter bits and shaggy clumps.
- 4Add the nuts — Stir the sliced almonds or pecans into the crumble with a few quick turns. Don't overmix, you want the texture uneven and craggy.
- 5Blanket the fruit — Scatter the topping evenly over the berries and press it down very lightly with your palm. Leaving a few gaps is fine, steam needs somewhere to escape.
- 6Bake until bubbling — Bake at 375°F (190°C) for 32 to 38 minutes, until the topping is deep golden brown and the filling bubbles thickly around the edges. The center should read about 200°F (93°C) on an instant-read thermometer.
- 7Rest and serve — Pull the crisp from the oven and let it sit 15 minutes on a wire rack. The filling will set from runny to spoonable. Serve warm with vanilla ice cream or a pour of cold cream.

Liam covers outdoor adventure and gear reviews, with a focus on ultralight backpacking and wilderness survival. He writes from personal trial and error, emphasizing safety and practical experience.