Let me lay out my materials first, because this Biscoff Icebox Cake is a no-bake assembly job and good mise en place is 80 percent of the work. You will need a 9×13-inch (23×33 cm) glass or metal baking dish, a stand mixer or hand mixer with a large bowl, a rubber spatula, a small offset spatula, a digital scale, and a sharp serrated knife for clean slicing later. If you do not own a scale, measure the cookie butter by spooning it into a dry measuring cup and leveling it flat with the back of a knife.
Advertisements1
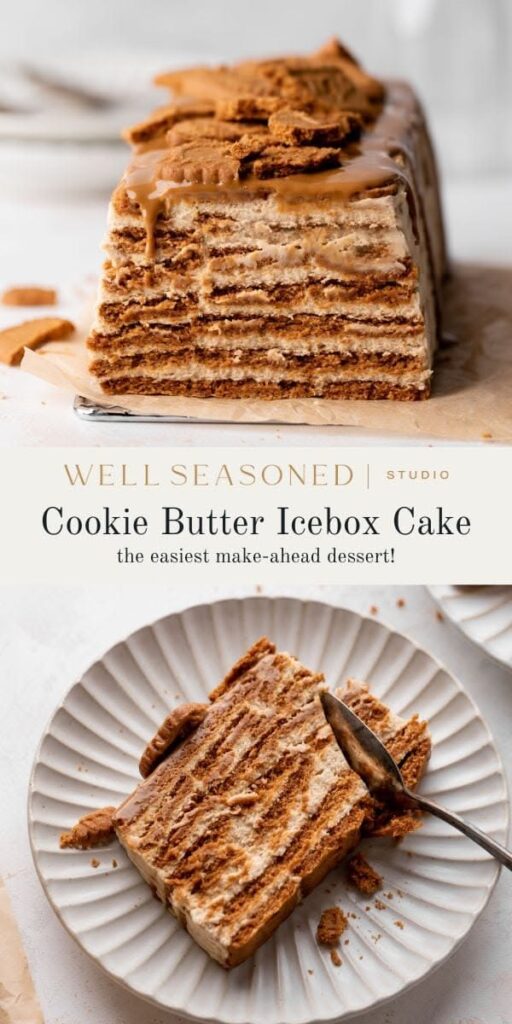
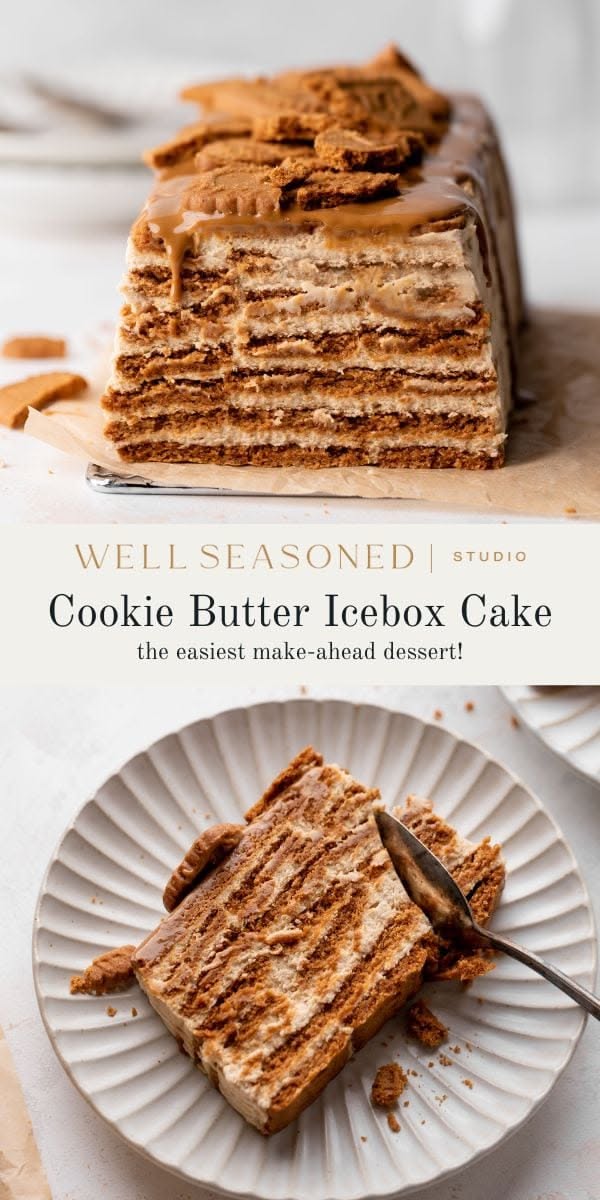
The architecture of this cake is simple: a base of lightly soaked Lotus Biscoff cookies, a whipped cream and cookie butter filling, and a final cookie crumb crown. Notice the word lightly. The single most important measurement in this entire recipe is the dip time for each cookie, and I will give you an exact number of seconds in Phase 2.
One structural reminder before we start: whipped cream is a foam, and foams collapse when they get warm. Keep your heavy cream in the coldest part of the refrigerator until the moment you pour it, and chill your mixing bowl for ten minutes if your kitchen runs warm. That one habit is the difference between a slice that stands tall and a slice that slumps on the plate.
Why You'll Love This Recipe
About the Ingredients
1 1/2 cups (360 ml) heavy whipping cream, divided
Use 36 percent fat cream, not half-and-half, or the filling will not hold its shape. A good substitute is 1 cup (240 ml) heavy cream plus 1/2 cup (120 ml) full-fat coconut cream, chilled overnight.
1 cup (250 g) Lotus Biscoff cookie butter (creamy, not crunchy)
Warm the jar in a bowl of hot tap water for five minutes so it pours and folds without lumps. If you cannot find Biscoff, Trader Joe's Speculoos Cookie Butter is a near-identical swap.
8 oz (225 g) full-fat cream cheese, softened to room temperature
Full fat only; the reduced-fat bricks contain more water and will thin the filling. Neufchatel works in a pinch but expect a slightly softer set and a tangier finish.
1 (8.8 oz / 250 g) sleeve Lotus Biscoff cookies, about 32 cookies
Buy one extra sleeve if you plan to decorate the top, since broken cookies happen. Gingersnaps or speculoos biscuits are the closest structural substitutes.
1/3 cup (67 g) granulated sugar
Fine granulated dissolves fastest in cold cream. Superfine or caster sugar is even better; do not use powdered sugar, which contains cornstarch and dulls the flavor.
2 teaspoons (10 ml) pure vanilla extract
Real extract, not imitation, because there is no baking heat here to hide off-flavors. Bourbon vanilla or a scrape of one vanilla bean pod both work beautifully.
1/4 teaspoon (1.5 g) fine sea salt
This is not optional; a pinch of salt keeps the cookie butter from tasting flat and cloying. Kosher salt works if you crush the flakes fine between your fingers.
1 cup (240 ml) cold whole milk, for dipping
Whole milk gives the best texture; 2 percent is fine, but skim soaks in too fast and turns the cookies to paste. Oat milk is the best dairy-free dipping option.
Tips & Tricks
Time Your Dip
Count one full second per side in cold milk, no longer, or the cookies dissolve into mush before the cake sets.
Chill the Bowl and Beater
Ten minutes in the freezer before whipping gives you stiffer peaks and a filling that slices cleanly.
Level as You Go
Press each cookie layer gently with the flat of your hand so the cake does not dome or slide when unmolded.
Rest Overnight if You Can
Eight hours of chilling lets the cookies soften into cake texture; two hours is the minimum and the center will still be firm.
Pro Tips
Step-by-Step Instructions
1. Prep the Pan and Cream
Line a 9×13-inch (23×33 cm) dish with a parchment sling, leaving two inches of overhang on the long sides. In a chilled bowl, whip 1 cup (240 ml) of the heavy cream with the sugar, vanilla, and salt on medium-high until soft-medium peaks form, about 2 to 3 minutes. Refrigerate this whipped cream while you build the base.
2. Beat the Cream Cheese Base
In a second large bowl, beat the softened cream cheese on medium speed for 60 seconds until perfectly smooth with no lumps, scraping the bowl once. Add the cookie butter and beat another 45 seconds until the mixture is glossy and uniform, like thick peanut butter. This step matters because any cream cheese lumps will show up as white flecks in the finished slices.
3. Fold the Filling Together
Add one third of the whipped cream to the cookie butter mixture and stir it in firmly with a spatula to lighten the base, then fold in the remaining cream in two additions, cutting down and sweeping up. Stop the moment the last white streaks disappear; the filling should look like soft mousse. If it feels loose, chill it for 10 minutes before layering.
4. Dip and Layer the Cookies
Pour the cold milk into a shallow bowl. Dip each Biscoff cookie for 1 second per side, no longer, and shingle them in a single tight layer across the bottom of the pan, breaking cookies to fill the gaps. Spread one third of the filling over the cookies with an offset spatula, pushing it into the corners.
5. Repeat the Layers
Build a second cookie layer, then a second third of filling, then a final cookie layer topped with the last of the filling. Smooth the top with the spatula so it sits level, wiping the blade clean between passes. You should end with three cookie layers and three filling layers in a pan that looks about three quarters full.
6. Chill Until Set
Cover the dish with plastic wrap pressed gently against the surface, or use the parchment overhang, and refrigerate for at least 2 hours and ideally 8 to 12 hours. The cake is ready when the center feels firm and cool to the touch and a knife inserted in the middle comes out with clean filling, not wet cream. Do not shortcut this; warm filling will not slice.
7. Decorate and Serve
Whip the remaining 1/2 cup (120 ml) heavy cream to stiff peaks and pipe small rosettes along the top edge, then press crushed Biscoff crumbs and two whole cookie halves into the cream. Lift the cake out by the parchment sling, slice with a hot dry knife, and serve cold. Store leftovers covered in the refrigerator for up to 3 days.
Delicious Variations
Chocolate Biscoff Icebox Cake
Fold 1/4 cup (25 g) Dutch-process cocoa into the cream cheese base and swap the milk dip for cold chocolate milk.
Salted Caramel Biscoff Icebox Cake
Swirl 1/3 cup (80 g) thick caramel sauce between the filling layers and finish with flaky sea salt before chilling.
Banoffee Biscoff Icebox Cake
Add a single layer of thin banana slices over the first filling layer and dip the cookies in cold coffee instead of milk.
How to Store Biscoff Icebox Cake Recipe Easy
Refrigerator
Cover tightly with plastic wrap or transfer to an airtight container and refrigerate for up to 3 days; the cookies soften further each day, so days 1 and 2 are the best texture.
Freezer
Freeze whole or in individual slices wrapped in plastic then foil for up to 1 month; the cream will firm but the texture stays pleasant because there is no gelatin to weep.
Reheating
Do not reheat this cake; thaw frozen slices in the refrigerator for 4 to 6 hours or on the counter for 30 minutes and serve cold.
Frequently Asked Questions
Q: How long does Biscoff icebox cake need to set?
It needs a minimum of 2 hours in the refrigerator, but 8 to 12 hours overnight is far better. The longer chill lets the cookies absorb moisture and turn into a soft cake layer while the cream firms up for clean slices.
Q: Can I make Biscoff icebox cake ahead of time?
Yes, and you should, because this is a true make-ahead dessert that peaks at 12 to 24 hours. Assemble it up to 24 hours in advance, keep it covered in the refrigerator, and add the whipped cream rosettes and crumbs within an hour of serving.
Q: Why is my icebox cake runny or soupy?
The usual culprits are under-whipped cream, cream cheese that was too warm, or cookies dipped in milk too long. Whip the cream to soft-medium peaks, use room-temperature cream cheese beaten smooth, and dip each cookie for only 1 second per side.
Q: Can I use Cool Whip instead of heavy cream?
You can, and it will still set, but the filling will taste sweeter and less rich. If you swap it in, use 3 cups (about 200 g) of thawed whipped topping and skip the granulated sugar entirely.
Q: How many cookies are in one sleeve of Biscoff?
A standard 8.8-ounce (250 g) sleeve of Lotus Biscoff contains about 32 cookies, which is exactly enough for three snug layers in a 9×13-inch pan. Buy a second sleeve if you want extra cookies for the top decoration.
Build this Biscoff Icebox Cake tonight, let it sleep in the refrigerator, and slice it cold tomorrow with a hot knife for that clean bakery edge. If you make it, tell me in the comments whether you went with the classic or the salted caramel swirl, and share a photo of your layers.
Biscoff Icebox Cake Recipe Easy
This Biscoff Icebox Cake recipe is the easiest no-bake dessert you will ever make, with creamy cookie butter layers and zero oven time needed.
🧂 Ingredients
- 1 1/2 cups (360 ml) heavy whipping cream, divided
- 1 cup (250 g) Lotus Biscoff cookie butter (creamy, not crunchy)
- 8 oz (225 g) full-fat cream cheese, softened to room temperature
- 1 (8.8 oz / 250 g) sleeve Lotus Biscoff cookies, about 32 cookies
- 1/3 cup (67 g) granulated sugar
- 2 teaspoons (10 ml) pure vanilla extract
- 1/4 teaspoon (1.5 g) fine sea salt
- 1 cup (240 ml) cold whole milk, for dipping
📋 Instructions
- 1Prep the Pan and Cream — Line a 9×13-inch (23×33 cm) dish with a parchment sling, leaving two inches of overhang on the long sides. In a chilled bowl, whip 1 cup (240 ml) of the heavy cream with the sugar, vanilla, and salt on medium-high until soft-medium peaks form, about 2 to 3 minutes. Refrigerate this whipped cream while you build the base.
- 2Beat the Cream Cheese Base — In a second large bowl, beat the softened cream cheese on medium speed for 60 seconds until perfectly smooth with no lumps, scraping the bowl once. Add the cookie butter and beat another 45 seconds until the mixture is glossy and uniform, like thick peanut butter. This step matters because any cream cheese lumps will show up as white flecks in the finished slices.
- 3Fold the Filling Together — Add one third of the whipped cream to the cookie butter mixture and stir it in firmly with a spatula to lighten the base, then fold in the remaining cream in two additions, cutting down and sweeping up. Stop the moment the last white streaks disappear; the filling should look like soft mousse. If it feels loose, chill it for 10 minutes before layering.
- 4Dip and Layer the Cookies — Pour the cold milk into a shallow bowl. Dip each Biscoff cookie for 1 second per side, no longer, and shingle them in a single tight layer across the bottom of the pan, breaking cookies to fill the gaps. Spread one third of the filling over the cookies with an offset spatula, pushing it into the corners.
- 5Repeat the Layers — Build a second cookie layer, then a second third of filling, then a final cookie layer topped with the last of the filling. Smooth the top with the spatula so it sits level, wiping the blade clean between passes. You should end with three cookie layers and three filling layers in a pan that looks about three quarters full.
- 6Chill Until Set — Cover the dish with plastic wrap pressed gently against the surface, or use the parchment overhang, and refrigerate for at least 2 hours and ideally 8 to 12 hours. The cake is ready when the center feels firm and cool to the touch and a knife inserted in the middle comes out with clean filling, not wet cream. Do not shortcut this; warm filling will not slice.
- 7Decorate and Serve — Whip the remaining 1/2 cup (120 ml) heavy cream to stiff peaks and pipe small rosettes along the top edge, then press crushed Biscoff crumbs and two whole cookie halves into the cream. Lift the cake out by the parchment sling, slice with a hot dry knife, and serve cold. Store leftovers covered in the refrigerator for up to 3 days.

Jonas writes about home renovation and woodworking, focusing on DIY projects that are achievable for beginners. He emphasizes careful planning and using simple tools to create lasting results.